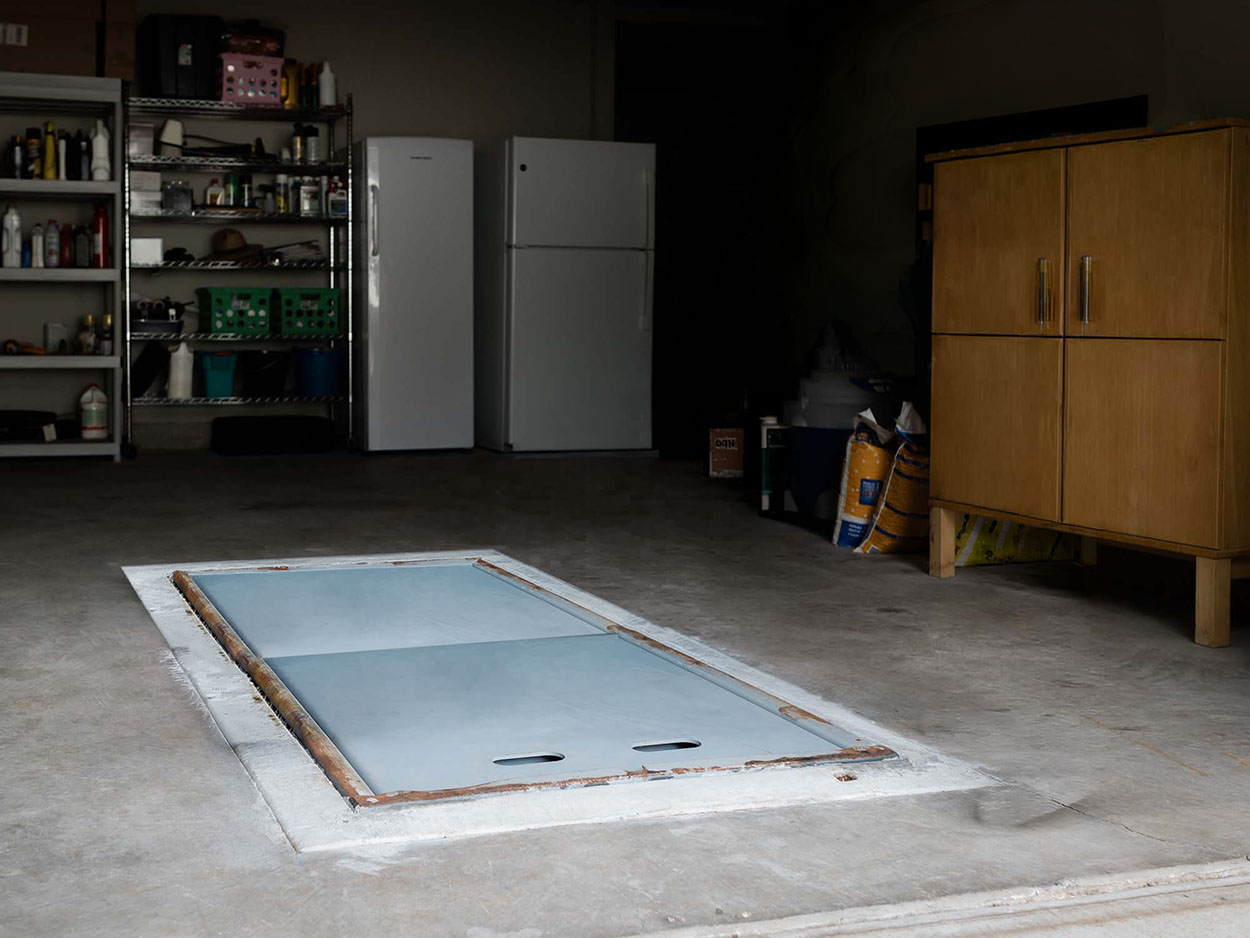
Open the hatch on any in-garage storm shelter that’s been sitting unprotected for a year or two. You’ll almost always find the same thing: a faint orange tinge on the lid frame, maybe a few flaking spots near the ventilation point. Most homeowners chalk it up to age. It isn’t age. It’s a predictable chemical process that’s been running since the day the shelter was installed—and it’s entirely preventable once you understand what’s driving it.
This post explains the real mechanics of why Oklahoma storm shelters rust faster than most people expect. It covers what the progression looks like from surface discoloration to structural concern, and what actually interrupts the cycle.
Why Oklahoma Shelters Rust Faster Than Most
Steel rusts when iron, oxygen, and moisture interact electrochemically. That’s basic chemistry. What makes Oklahoma in-garage shelters particularly vulnerable, however, is the combination of conditions in almost every residential garage in the state. Together, these conditions accelerate each step of the corrosion process.
Thermal Cycling
Oklahoma garages swing dramatically between temperature extremes. Subfreezing nights in January give way to 110°F+ interiors on July afternoons. Every time the temperature drops below the dew point, moisture condenses directly onto metal surfaces. This happens repeatedly—often overnight, often daily during spring and fall. As a result, the shelter isn’t getting wet from rain. Instead, it’s getting wet from the air itself, over and over, in a cycle it can’t escape.
Humidity Concentration
Garage environments trap humidity in ways that living spaces don’t. Cars bring moisture on their surfaces and in exhaust. Garage doors create a partial seal that holds humid air in during summer. The shelter hatch sits at floor level—the coldest, wettest microclimate in the garage. That’s a natural condensation zone, and it doesn’t dry out between events the way an elevated surface would.
Red Clay Dust
Oklahoma’s red clay soil is mildly acidic and hygroscopic—it holds moisture. When it settles on metal surfaces, it keeps that moisture in direct contact with the steel. In contrast, bare metal allows moisture to evaporate. Clay-covered metal stays wet longer. As a result, dust that blows into the hatch area isn’t just dirty. It actively extends the wet contact time that drives oxidation.
Salt and Chemical Exposure
De-icing products on garage floors introduce chloride compounds to the shelter’s environment. Importantly, these don’t need direct application to cause damage—they migrate in water and settle on nearby surfaces. Chlorides dramatically accelerate electrochemical corrosion on bare or compromised steel. In fact, a single application tracked onto the crown can initiate corrosion within days.
The Four Stages of Shelter Rust
Rust doesn’t arrive all at once. It moves through predictable stages. Catching it early makes the difference between a ten-minute fix and a repair that costs hundreds of dollars.
Stage 1 — Surface Oxidation
The first sign is faint orange or reddish-brown discoloration. It often appears first at welds, scratches, or anywhere the factory coating was nicked during installation. At this stage, the metal is still structurally sound. A wire brush, rust-converting primer, and light topcoat can handle it. Left alone, however, it advances within months.
Stage 2 — Active Pitting
Once surface oxidation establishes itself, moisture concentrates at the rust sites—rust itself is hygroscopic. As a result, the process accelerates. Small pits form in the steel surface, increasing the area exposed to oxygen and moisture. The lid may develop minor resistance in its track. Eventually, coatings start to flake at the edges of rusted areas.
Stage 3 — Functional Degradation
At this stage, rust at the frame perimeter and crown contact points can affect opening the shelter. Oxidation builds up along the edges where the lid meets the concrete surround, creating friction and rough spots that weren’t there before. What used to slide back in one smooth motion now requires more effort. In an emergency, that extra resistance matters.
Stage 4 — Structural Compromise
In severe cases—typically shelters ignored for many years—pitting corrosion can compromise the structural integrity of the lid or frame. This is rare in shelters that receive any attention. But it’s the end state of a process that started with a reddish tinge that was easy to address.
Where to Look First
Not all surfaces carry equal risk. Start your rust inspection with the highest-risk areas:
- Weld seams — factory coatings are thinnest here, and surface irregularities trap moisture.
- The underside of the lid lip — rarely seen, rarely cleaned. This is the most likely place to find advanced rust that a casual inspection misses.
- Vent penetrations — any gap between metal and a dissimilar material creates a moisture trap.
- The crown perimeter — where the lid meets the concrete. Debris collects here and holds moisture against the metal edge.
What Actually Interrupts the Cycle
The root cause of accelerated shelter corrosion is sustained moisture contact with unprotected or damaged metal. Interrupting it requires addressing both the moisture source and the surface protection—not just one or the other.
Keep the Crown Area Clean and Dry
Debris around the hatch—red clay dust, leaf litter, pollen—holds moisture against metal surfaces. It also creates an acidic organic layer that accelerates corrosion. For that reason, a weekly sweep during storm season and a monthly brush-off at minimum prevents this layer from establishing. This is the lowest-effort, highest-impact maintenance habit for rust prevention.
Address Surface Damage Promptly
Every scratch, nick, or chip in the shelter’s coating is a potential rust initiation site. Therefore, touch up damaged areas with a compatible rust-converting primer and topcoat when you notice them. Don’t wait for a scheduled maintenance window. Surface oxidation gets a foothold fast, and early action is cheap.
Control Moisture at the Source
The single most effective change you can make is reducing moisture around and on the shelter surfaces. A breathable shelter cover does this by blocking the debris and dust that holds moisture against metal. It allows vapor to pass through rather than trapping it. A solid tarp or vinyl cover does the opposite—it seals moisture against the hatch and accelerates the very process you’re trying to prevent. The breathability isn’t incidental. It’s the mechanism that makes the cover work for rust prevention rather than against it.
If Rust Is Already Present
Finding rust on your shelter isn’t a crisis—it’s a signal that the prevention system hasn’t been in place. Fortunately, the steps are straightforward:
- Wire-brush or sand the affected area to remove loose rust and flaking coating.
- Apply a rust converter to the exposed metal. This neutralizes remaining rust and creates a primer-ready surface.
- Apply a compatible primer, then a topcoat rated for metal and outdoor use.
- Inspect surrounding areas for early-stage pitting not yet visible to the eye.
- Put a maintenance system in place—a breathable cover and a regular sweep schedule.
The Bottom Line
Storm shelter rust isn’t inevitable. It’s a predictable result of sustained moisture contact with metal in an environment that creates unusually favorable conditions for corrosion. Understanding the mechanism makes the prevention obvious. Keep the metal dry and the coatings intact. Block the debris layer that holds moisture against surfaces.
A breathable cover handles that last piece automatically. As a result, it’s the single most impactful addition most shelter owners can make to their maintenance routine. Everything else is inspection and touch-up—a few minutes a month to protect an investment your family depends on.